
Okay, folks. If you are from Texas, you know that Bluebonnet pictures in the Spring are about as traditional as Santa at Christmas-time.
I’m going to speak some heresy here, but honestly bluebonnets aren’t my personal favorites for photos. Don’t get me wrong, I love gazing at fields of them, but I’m more partial to the yellow weeds that pop-up around the same time, or fields of blended wildflowers for a photo-op.
If you haven’t clicked away in disgust, or dis-owned me as a friend, just know that I’m still happy to help you get those amazing Bluebonnet photos, that you probably love.
Tradition has typically dictated that this time of year is a prime time for photographers offering Bluebonnet Mini Sessions. However, as we know, Spring 2020 is ANYTHING BUT TYPICAL. (Insert COVID-19.) Photographers fall under non-essential services, and for the safety of our communities, and by mandate, we are not working. Thus, mini-sessions are down the drain.
Yet, all hope is not lost. Even with the shelter-in-place restrictions, you can be outside in the fresh air with your own family (the people from your household), as long as you’ve taken the precautions of wellness, and maintain safe social distance from others. So, I thought I’d give you a few tips for creating your own Bluebonnet photos.
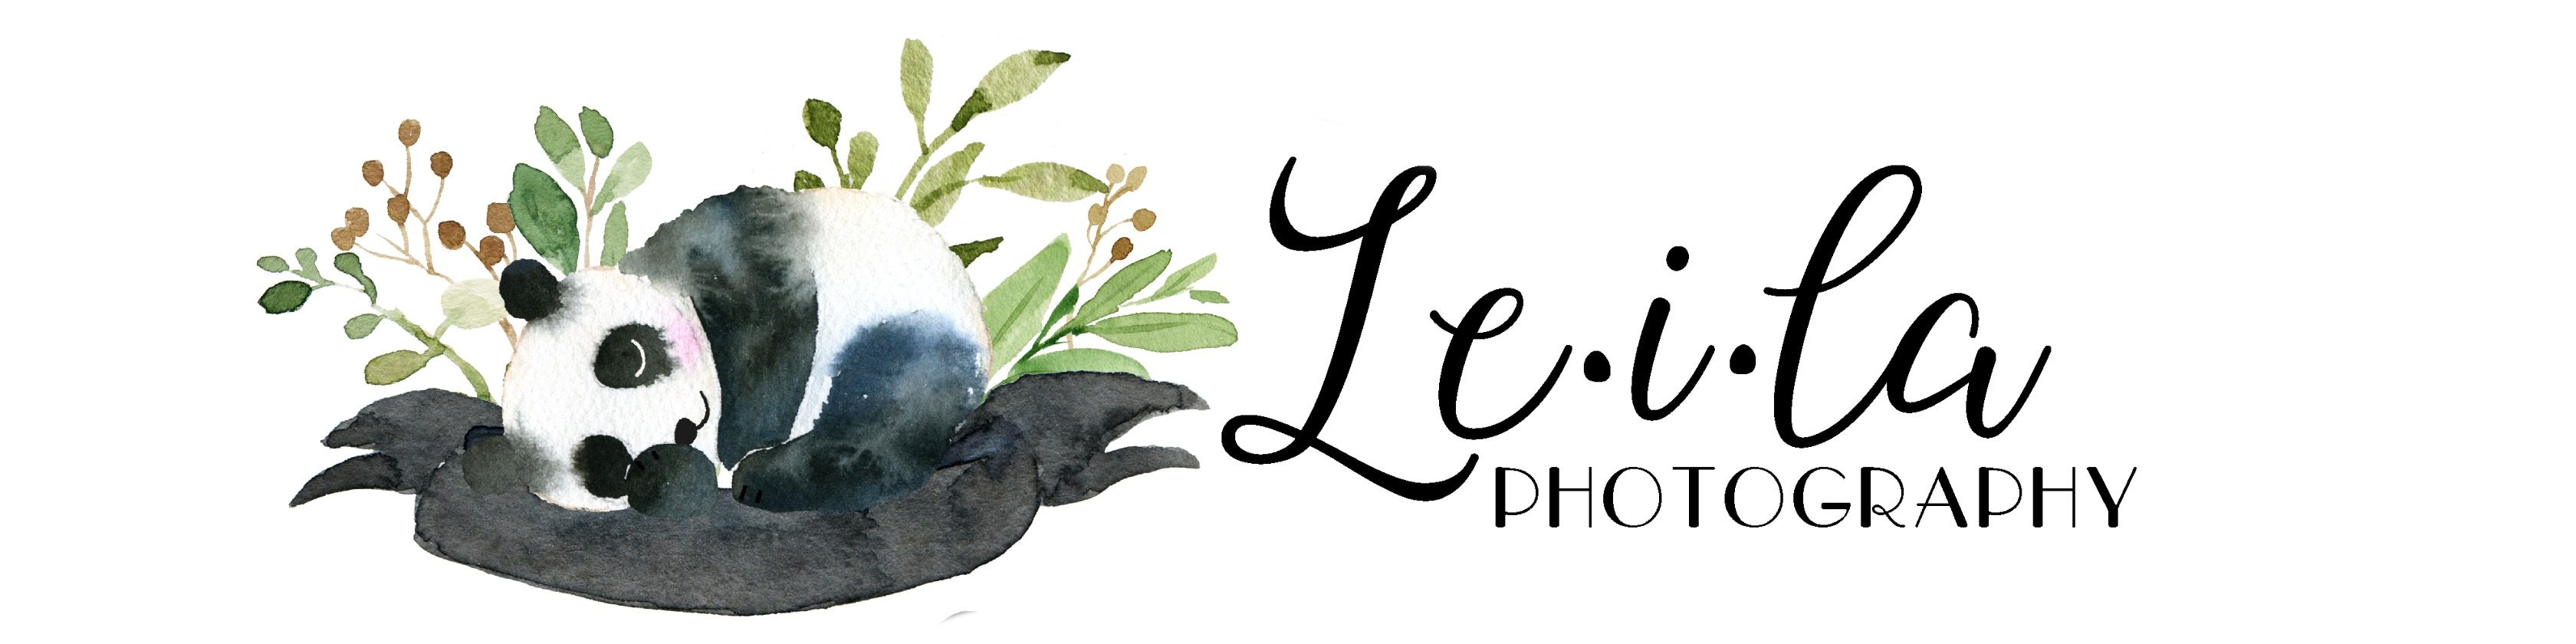
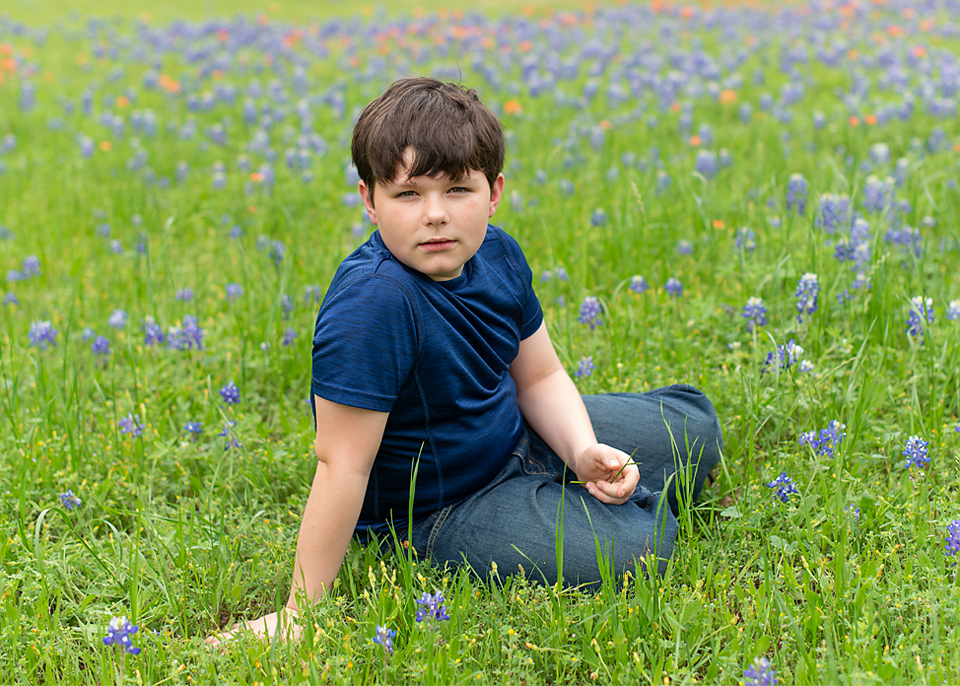
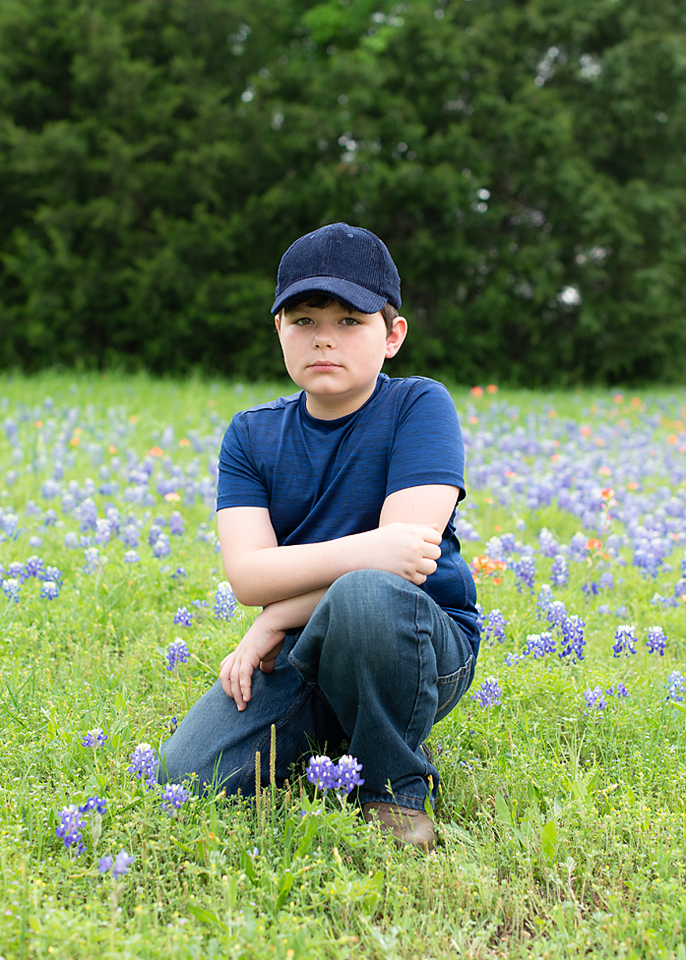
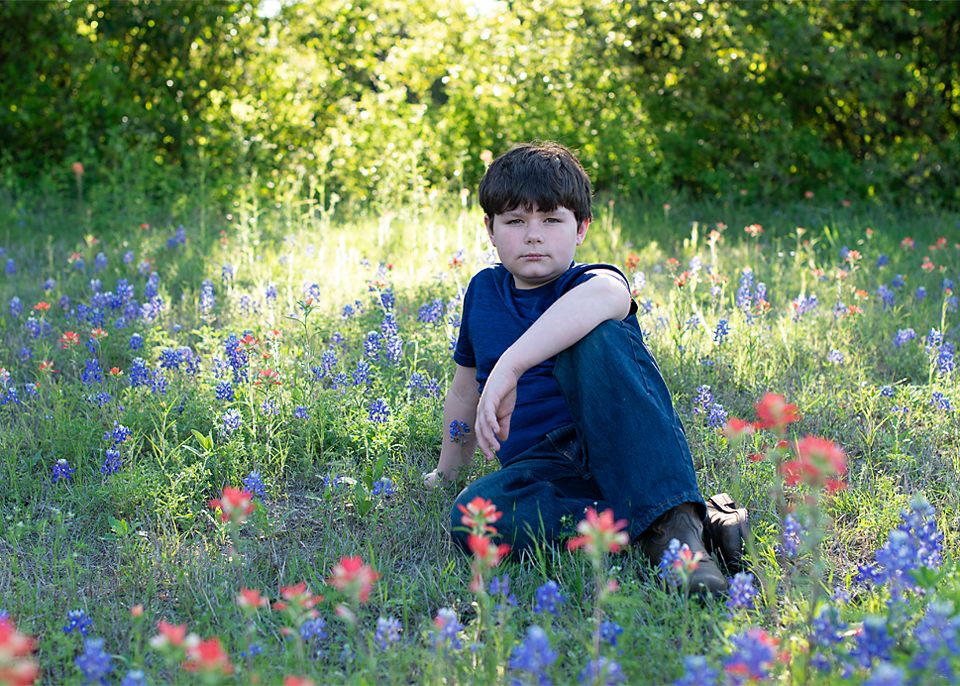
(Before we go any further, please note: My model for this session (my youngest child) hates to smile. I have not even one school picture of him smiling. A smirk? Yes. Smile? Nada. Enlisting his participation in this project, cost me five dollars, an incredible amount of begging, and the promise of an egg sandwich for dinner.)
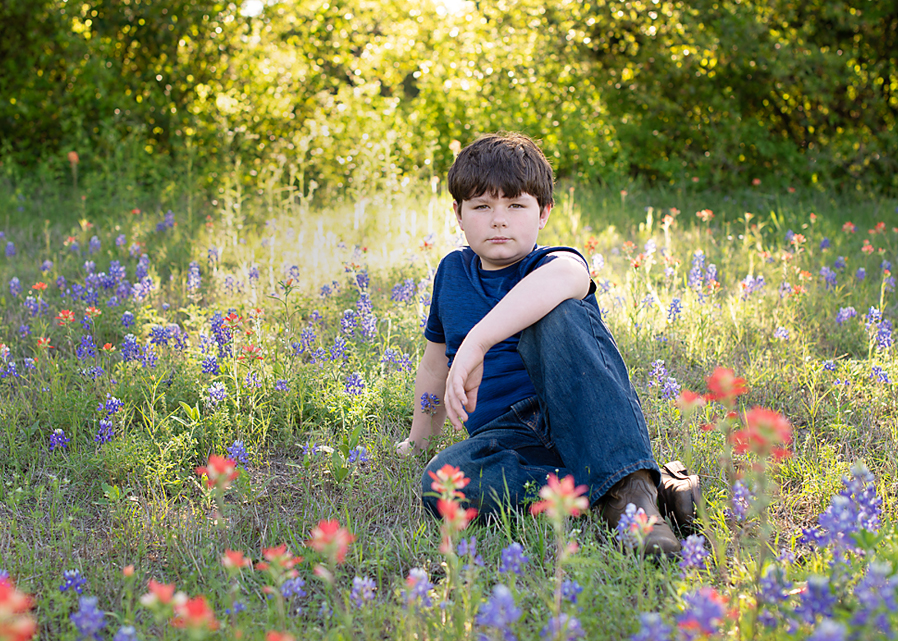
Also, I tried to show the majority of my images SOOC (Straight Out Of Camera), without edits, so that they would more accurately represent what you could create yourself.
Tips for taking your own bluebonnet photos:
Safety
You guys know that safety is something that I talk about quite a bit in business. Although that is generally in reference to working with my tiniest of clients, it ALWAYS applies. So please take care when snapping your own bluebonnet photos. Snakes are enjoying these warmer temperatures, too. (My highly unscientific snake-weary approach includes stomping around, while keeping my eyes peeled, before directing someone to a spot in grass.) I like to photograph wildflowers early in the season, before the weeds are too tall. (It’s prettier and safer). Additionally, be sure that the location you choose is away from traffic, and respect that personal property should not be accessed without permission. It’s common to find fields of bluebonnets around public parks, which are safely accessible.
Time of Day :
You are walking (or driving) past a field of bluebonnets. The sun is high in the sky, and the wildflowers glisten and call to you, I get it. But, this is NOT the best time to take your bluebonnet photos. I frequently see people on the side of the road, with the sun beating down, and their children posed in bluebonnets, squinting against the sun. Unfortunately, unless you are countering the sun with some other measures, you will get very unflattering bright spots and harsh shadows, when you take your photos with the sun is high in the sky.
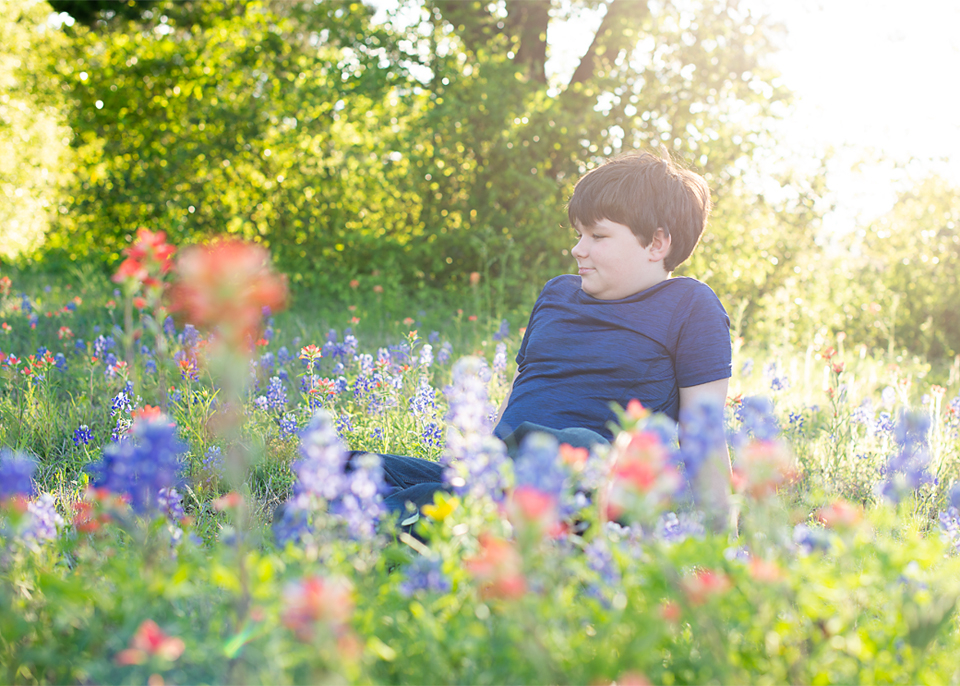
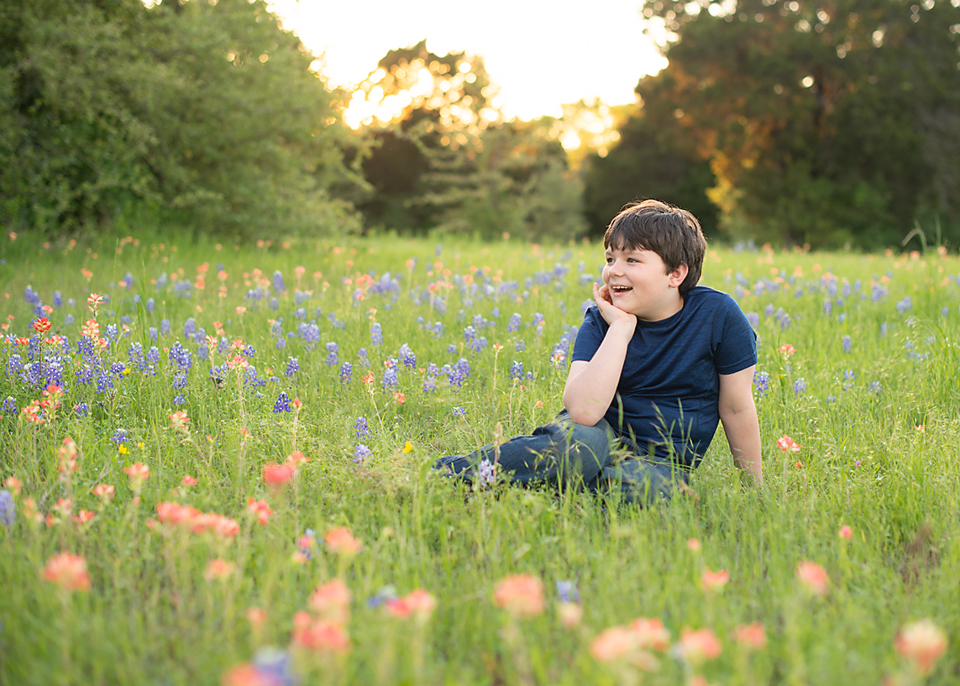
With all of the resources at our fingertips, and maybe previous photography sessions, you may have heard of, “Golden Hour.” It is an on-location photographer’s favorite time to schedule portraits, as the sun has lowered in the sky and won’t produce the overly bright highlights, and harsh shadows. It also gives a warm, golden-glow to your photos (thus, the name.) So taking your photos within an hour of sunrise, or an hour before sunset, generally provides this beautiful lighting experience. (Your weather app will generally give you a sunset time, but you can also google “your city” + “sunset times” and get that information.)
I generally shoot with the light behind my subject, so that I can get some back-lighting in the hair (and not get squinty eyes). If this creates a “darker” face than you want, you can use a reflector, to bounce light back onto your subject. (A piece of white foamboard or even your gray/silver car sunshade, could reflect some light back into the subjects face. It definitely helps to pull another family member to assist with holding the “reflector,” while you snap the photo.)


Overcast Days:
If it’s overcast, which is also common in Texas’ Spring, the clouds act as big diffusers for the sun, and the light is more even. So, you can get away with photographing at different hours without harsh sunlight/shadows. It does create a very flat light, so I don’t love it as much as golden hour, but it’s a great way to photograph without worrying about too many technical details. Also, even though the light isn’t direct, subjects can be sensitive to the light and have “squinty eyes.” I liked the addition of the hat, because it added a little shadow, and helped with squinting.
Open Shade:
Since wildflowers grow in the sun, you don’t typically find them in open shade mid-day. However, in early evening (but before golden-hour) you can find areas where the sun is behind the trees and casting shadows over the wildflowers. Again, this allows you to photograph without the harsh sunlight and dark shadows on your subject. It can create a “cooler” temperature photo, which you may love. I prefer warmer tones. (Easily adjusted with editing software or a filter) Also, with open shade, any bright light in the photo can be a “hot spot” or overly exposed, because your exposure is based on your subject in the shaded area of the photo.
Camera Settings:
If you love the look of shallow depth of field (the subject in focus and some of the background or foreground out-of-focus/blurry), some phones now have that option. My I-phone has a “Portrait Mode” which will keep the subject in focus and blur the background. Some android phones tout this feature as well. From what I can find, it looks like it is called a “Selective Focus” mode. (This is 100% Google knowledge, though, so I could definitely be wrong.)
If you are using a DSLR camera, you can use your (A) Aperture Priority mode, to adjust the Aperture wider or more “open” to create shallow depth of field. (Lower number apertures, I.e. 2.8, 3.5 are more open than 5.6, or 6.3). Using Aperture mode, your aperture will remain constant and your camera will adjust your shutter speed for you. If your images are too dark, or underexposed, increase your ISO. If they are too light, or overexposed, decrease your ISO. (Your photographer is generally shooting in full Manual mode, to adjust the exposure triangle: Aperture, Shutter Speed and ISO, for the image they want to create.) However, if you are unfamiliar with using anything besides Auto mode, you may want to play around with Aperture priority mode.
Point of View:
Try out different angles. Get low and shoot through some flowers. Shoot from above. A little variety can give you a photo you love.
Top Tip:
My biggest, number one, best photo tip of all time? Photograph someone you love. Then it will make you smile, even if you don’t get all of the “technical” details correct.
I hope you guys find these tips helpful, and will tag me in any Bluebonnet or wildflower photos you take yourself, or drop them in the comments in our VIP Facebook Group. If you have questions, be sure to drop them in the comments. I miss your faces, and as always, stay safe.
