My favorite thing about Photoshop Week 2014 was that I found answers to questions I didn’t even know I had. It was amazing to discover new tools and strategies that would rock my world. Since I have been in “education mode” the last few weeks, I used this post to open up a Q&A for helping you find answers to questions you might have.
One of my clients posed a question that I believe is a common theme among new DSLR users. “Is there some layman’s term literature on how to do semi-professional photography? I have a pretty nice camera, but only use it on auto. I’ve tried to learn how to do it on my own, but I can’t find an easy how-to manual on how to do it. I just want to learn the basics on how to use different functions on my camera.”
I decided to blog this in two parts. This first part is devoted to “Why?”. Why should you want to learn more about your camera settings? After all, the technology involved in your camera’s auto settings has advanced greatly. Your camera is “looking” at the scene and judging what would make the best exposure. Isn’t this a good thing? I mean, technology has come a long way.
The great thing about understanding the basics of exposure, and what those settings on your camera mean, is that puts you in control. We like that right? We want Control! Waaaahahaha (insert maniacal laugh). Just kidding, but it does make a huge difference. Understanding exposure and your camera, is the beginning of producing the images that you want to create.
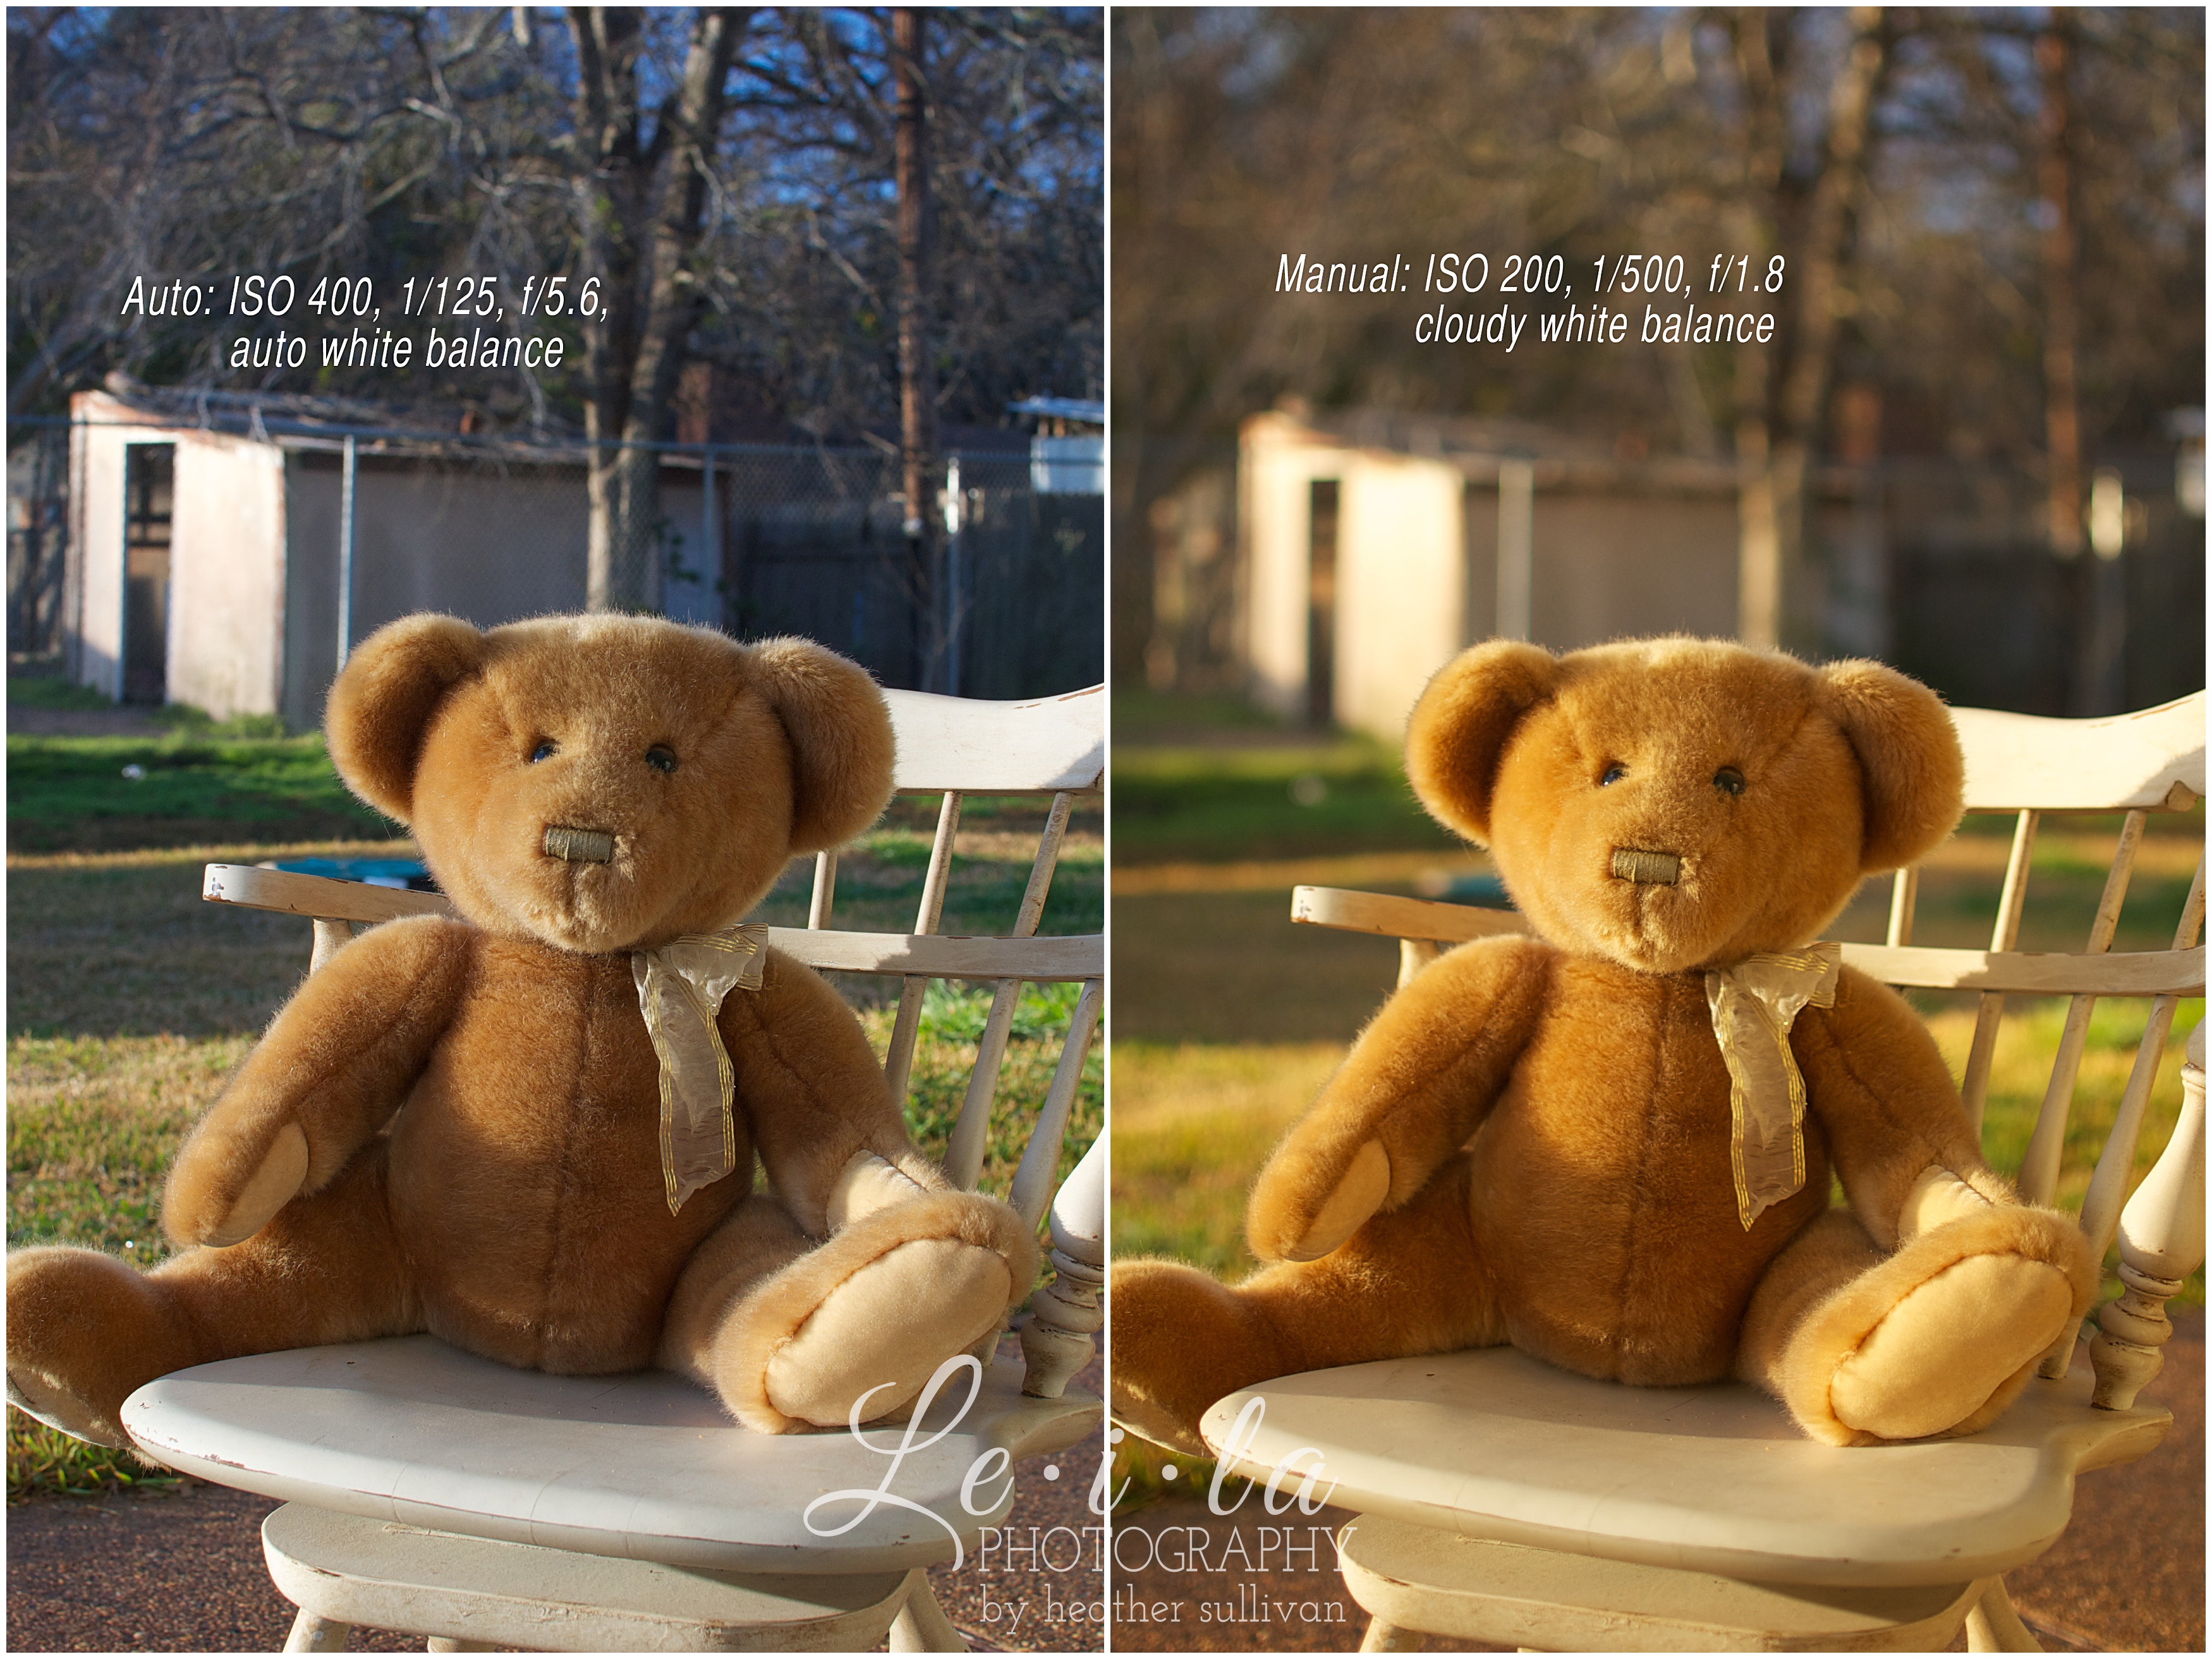
Here are some basic examples. My full-frame camera doesn’t have a true “Auto” mode, so I took these with my Nikon D40, 35mm 1.8 lens. It is an entry level camera that released in 2007. It is not a new or high-end camera. For any DSLR you have, even entry level, you can benefit from understanding how to use it. These photos are SOOC (Straight Out Of Camera), except for a slight crop and rotation to make the perspectives match more closely for comparison purposes. These are in no way meant to be good examples of composition, just a quick comparison of shooting on auto mode vs. manual mode.
I’ve listed the settings on each image, so that you can see what the camera chose, and what I chose. ISO is listed first, then shutter speed, and lastly the aperture. I chose to shoot “wide-open” with a smaller f-stop, so that there would be a shallower depth of field, making Mr. Ted E. Bear stand out more. The shallow depth of field eliminates some of the distraction from the not-so-photo-worthy background. Also, I have a personal preference for warmer pictures. So, I tend to set my white balance on “cloudy” which produces a warmer picture, or I do a custom white balance. The white balance, in this case, is completely personal preference. However, when I shoot manual I can control the image so that it looks the way I want it to look. These photos were taken only seconds apart. While the tree coming out of the bear’s head was terrible composition on my part, the camera’s auto setting isn’t necessarily bad. It just doesn’t interpret the image the way I want it to look.
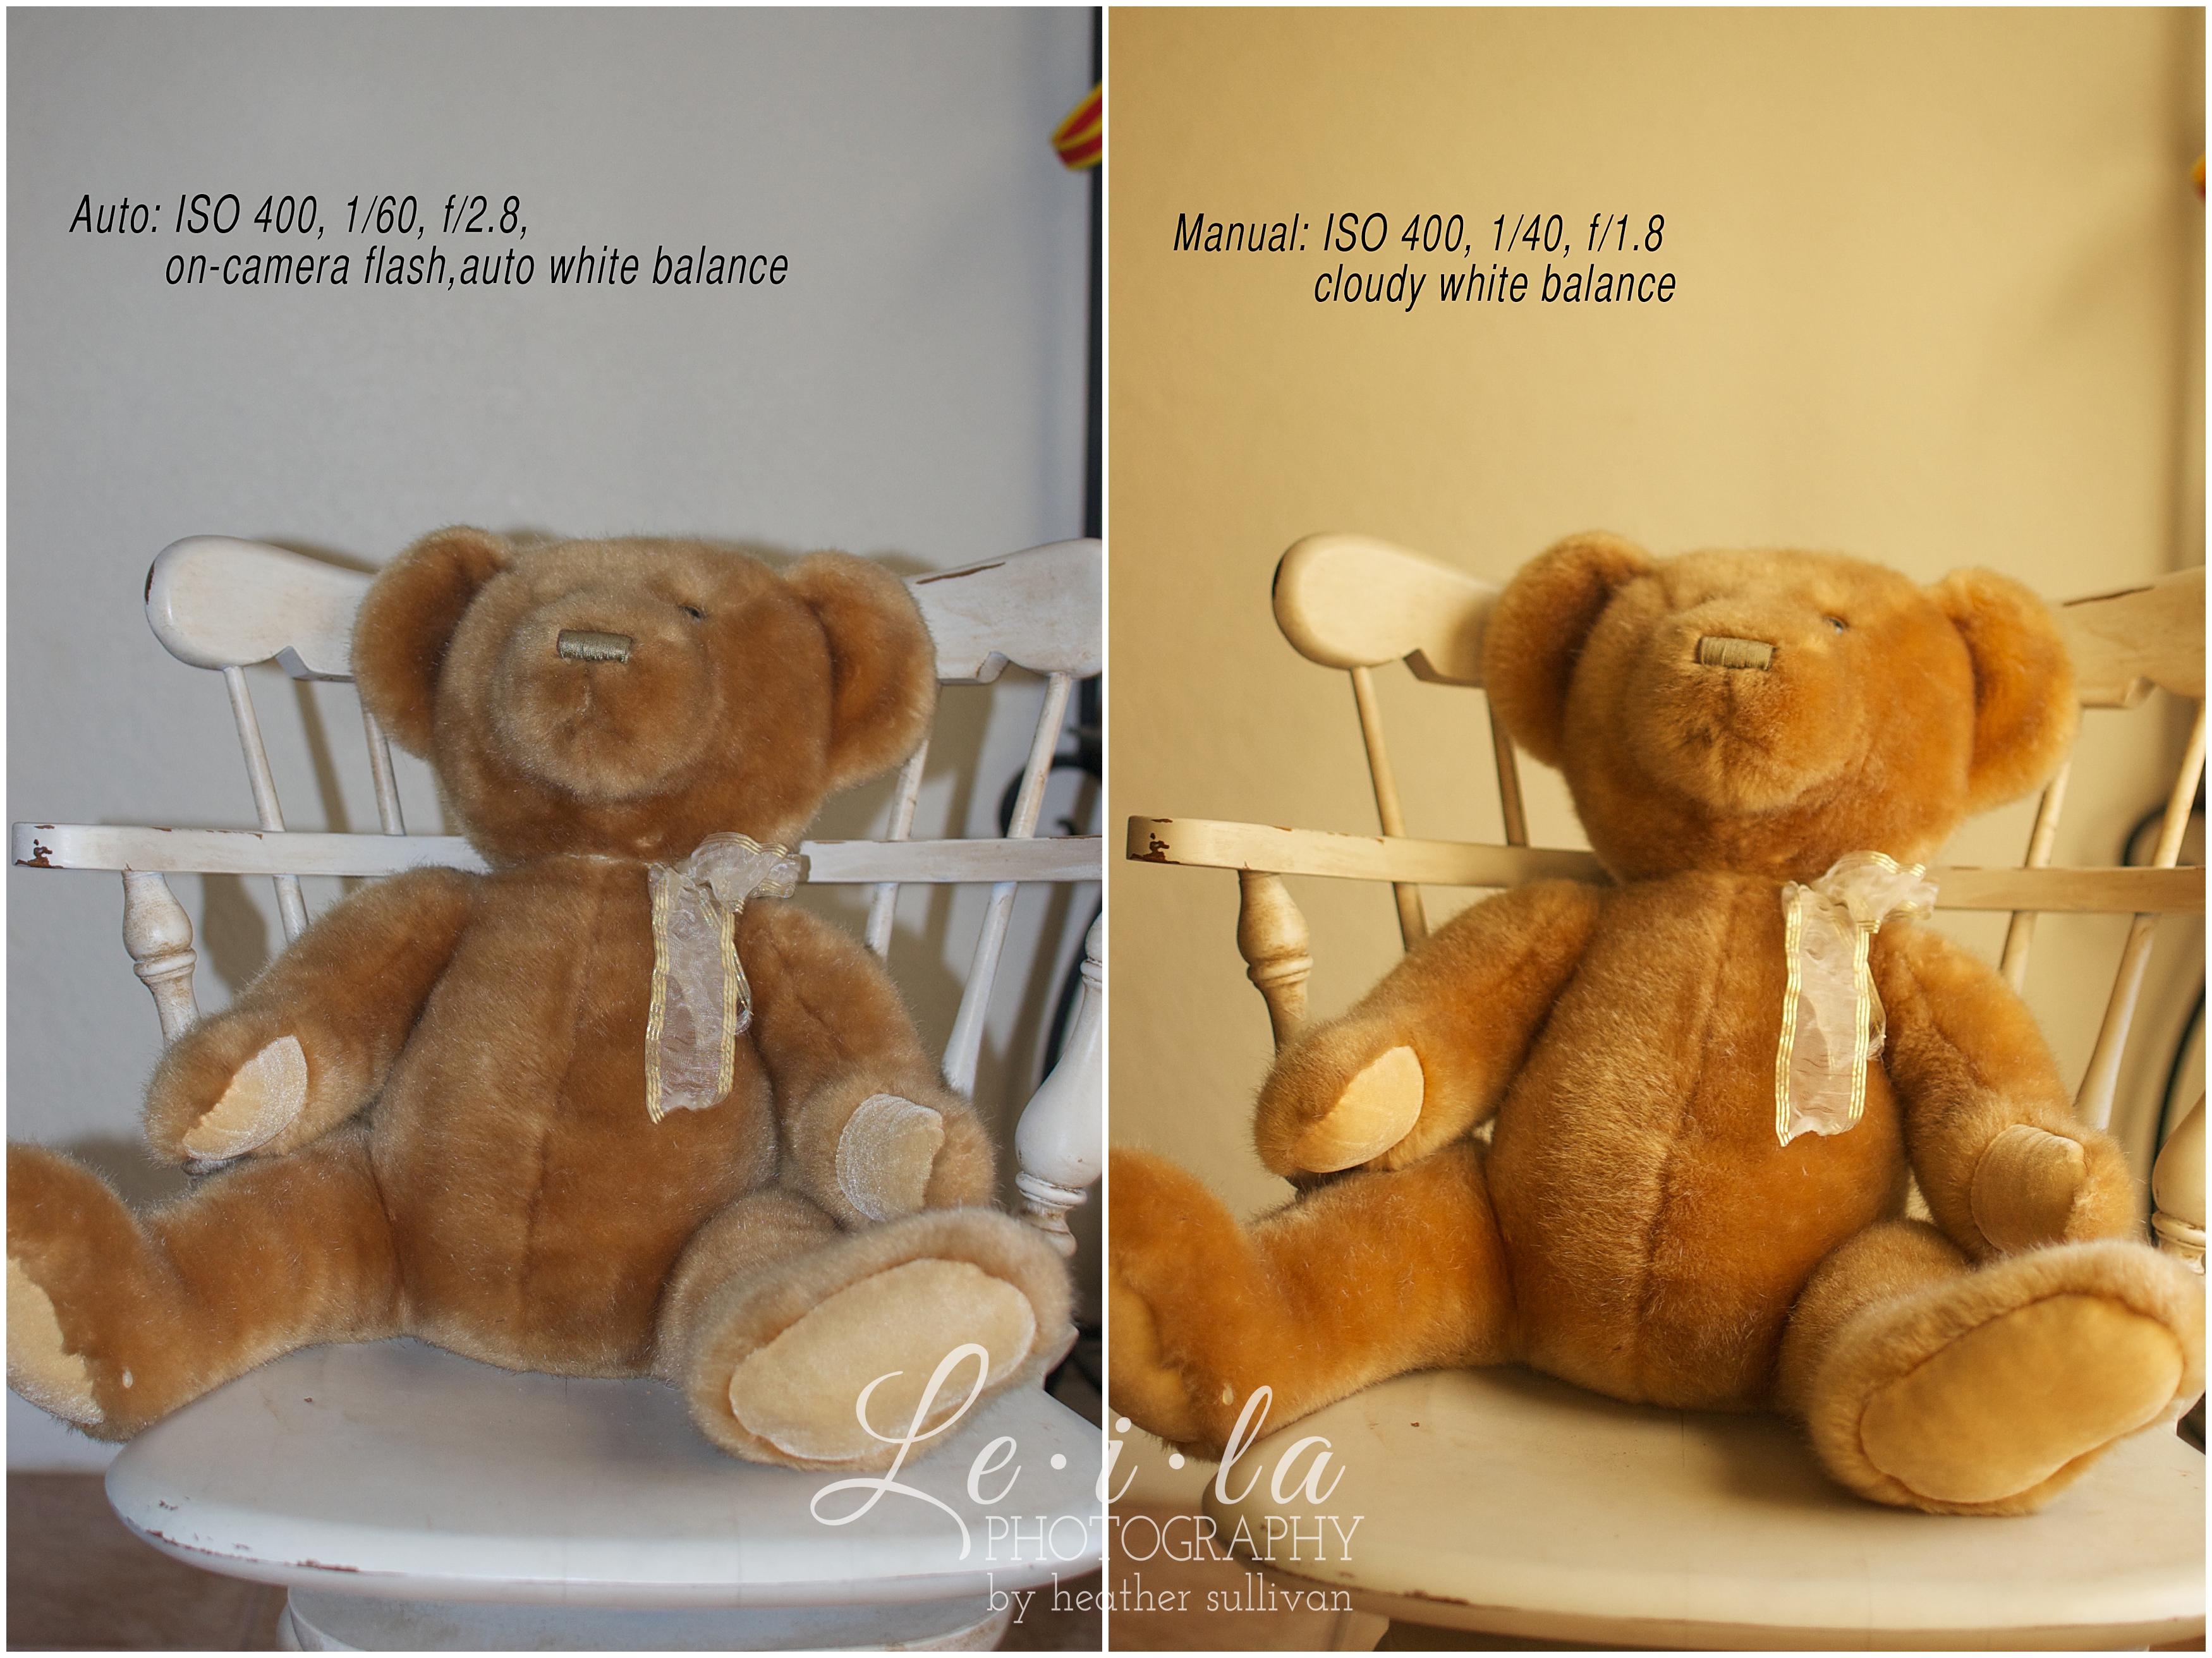
Indoors, my Auto setting “decided” to use the on-camera pop-up flash. As you can see, the flash creates harsh shadows against the back wall. On-camera flash, without modifications, is generally very unflattering to your subject. If I was photographing children, I would never shoot with my shutter speed this low because it results in blur from camera shake or subject movement. With my full-frame camera, I would have increased my ISO so that I could shoot at a much higher shutter speed. However, the D40 does not perform well at an ISO above 400. So, since Mr. Ted E. was such a great and still model, I knew I could get by with a lower shutter speed for this example. Again, a warm image is just my personal preference. The main reason I chose to share this indoor shot was to point out the disappointing results of using on-camera flash.
I know. I know. I’m throwing out words like Shutter Speed, Aperture and ISO, that may have your head spinning, but this WILL make more sense. Tomorrow, I will blog some amazing resources for understanding what these things mean and how they impact your imagery. I know you want to be in control of your camera settings, so that you can produce better images. You want to take pictures that are in line with your vision and not what your camera “chooses” to snap on auto-mode. You can do this. You can be in control and take images the way you’ve always wanted. Check back tomorrow for the follow-up blog, because you are going to absolutely love some of the resources I’ve gathered for you!
